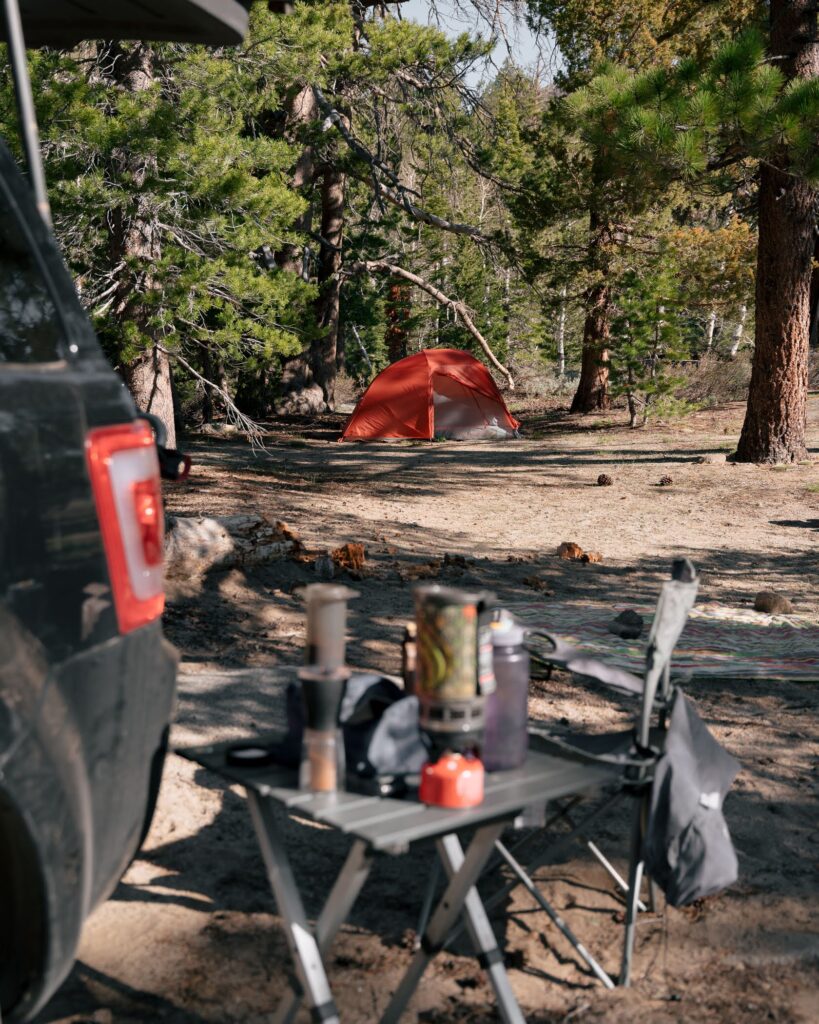
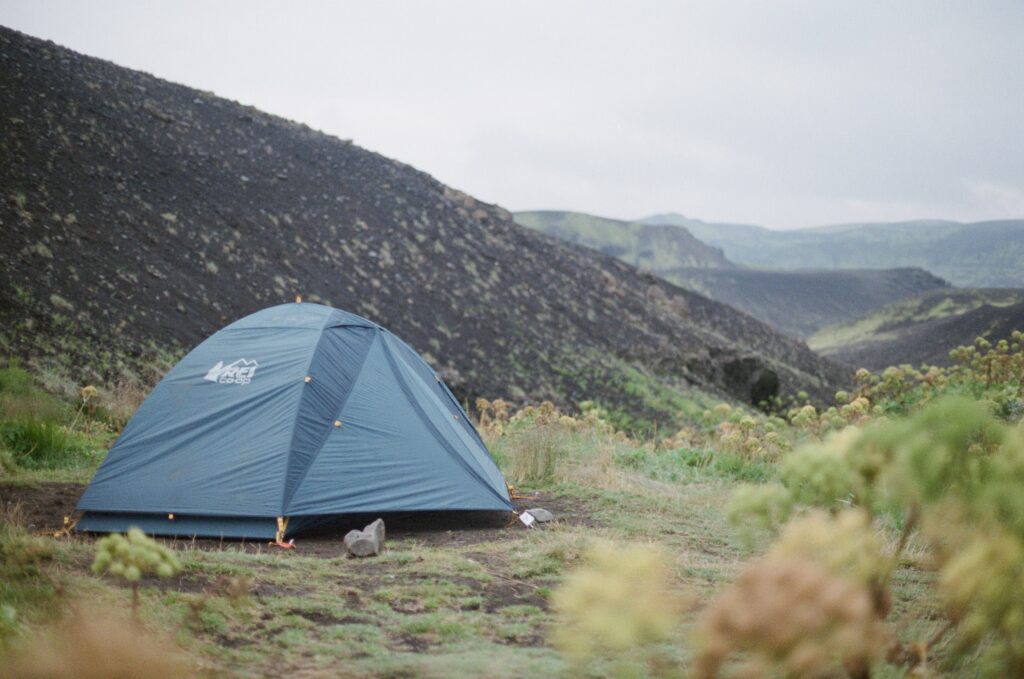
I often feel it too, the desire to pack up and disappear into nature if only for a weekend. Peace and quiet, less screen time, beautiful scenery all around, an escape from the grind. Camping is, in my opinion, the best way to decompress outdoors. There’s something about sleeping under the stars that day trips can’t match. But I know it can be intimidating for beginners—from figuring out where to go, what gear to buy, what to eat, what to wear, to staying safe—it can seem overwhelming.
I’ve been camping for more than 20 years and I’m here to tell you it doesn’t have to be intimidating. This guide includes everything I know to help you plan your first camping trip stress free. I hope it jumpstarts you down a lifelong path enjoying the outdoors.
Here’s all the beginner camping tips we’ll cover:
- How to plan your first camping trip.
- My recommended first camping trip (planned for you!)
- The essential camping gear checklist
- Setting up your campsite
- What to eat when camping + meal ideas
- Camping safety and dealing with fear
- Camping hacks to look like a pro
How to plan your first camping trip
Let’s start from the top and plan your trip. Here are the steps to planning your trip. I’ll walk you through each in detail. If you’re still unsure after that, just scroll down to my recommended trip plan to get started.
- Decide what type of camping you want to do
- Figure out where and when you’ll camp
- Make your camping reservation + how to choose a campsite
- Gather and pack up the necessary gear
Types of camping
There are many types of camping out there. Everything from tent camping to backpacking to RVing. For the sake of this guide, we’ll focus on the best types of camping for beginners that are relevant for you right now.
- Tent camping—Simple enough. Drive to a campsite, set up a tent, sleep in it. The most traditional type of camping, also often referred to as car camping.
- Cabins—Depending on your definition of camping, this might feel more like a rustic hotel, but I think the cabins often available at campgrounds can be a great way to ease yourself into camping if you aren’t ready for tent life.
- Glamping—Many campgrounds and privately owned areas offer glamping, which is sleeping outside in luxurious canvas tents with full beds and other amenities. Again, another comfortable way to ease yourself in if you want more creature comforts.
This guide will revolve around tent camping. Choosing the type of camping you want will inform what gear you need and where you go. You should try out all types of camping once you feel ready: dispersed camping is my favorite which means camping in more wild areas with no amenities, or backpacking which is human-powered camping carrying all your gear with you. But I started with tent camping as a kid and recommend it as a starting point. It never goes out of style.

Where and when to camp
The type of camping you choose influences where to go, but tent camping offers the most flexibility. There are a variety of places you can go tent camping:
- National park and national forest campgrounds
- State park and state forest campgrounds
- Privately-owned campgrounds
- BLM land and national forest roads
As a beginner, I recommend staying in an established campground. State parks are my favorite for beginners because they’re local, affordable, usually offer plenty of amenities, and are bursting with activities to enjoy. National parks are some of the best natural environments in the United States, they just come with a bit higher cost and competition for spots.
BLM (Bureau of Land Management) land and national forest roads are more wild and lack amenities. Dispersed camping is king in these places. They are fun to explore and discover, so keep this in mind for when you feel ready. Note how I specifically mention national forest roads—often you can dispersed camp on forest roads outside of established campgrounds that may also be nearby.
Wondering when to camp? Summer is the best time to camp for beginners. Fall can be amazing, especially if you camp somewhere the leaves are changing, but you may have to deal with cold weather and other end-of-season factors. Summer camping is the classic for a reason.
Important note: Especially for popular areas, reservations will be competitive during the summer. Planning in advance will give you a better shot at the trip you want. For example, in Colorado it gets so competitive that you often have to make your reservation as soon as it becomes available (typically six months before check-in date).
Make your camping reservation (+ how to choose a campsite)
Booking your campsite is your next step. You’ll want to make a reservation and know exactly where you’re going. Many campgrounds offer walk up campsites on a first-come first-serve basis, but I don’t recommend trying this when you’re just starting out. Make it easy on yourself!
There are a multitude of options for reserving a campsite depending on where you go, here are some of my favorites:
- Stateparks.com—An amazing resource for seeing what state parks your state has, which offer camping, and even finding a reservation all in one place. I love this site. We’ll use this site to make my recommended trip below.
- Reserve America—Many state agencies use ReserveAmerica for their camping reservations, but you’ll find other government-related sites and privately owned available on Reserve America too.
- State DNR or Parks & Wildlife websites—If you want to discover the options in your particular state these sites can be very helpful to explore. They’ll guide you to whatever booking options they have as well. Here’s Colorado’s as an example.
- Recreation.gov—Focused on government-owned areas and national parks, recreation.gov is the place for permits and campsites at some of the best places the United States has to offer.
- Campendium—A great resource for finding different types of campsites from RV parks to free dispersed sites and everything in between.
- Go Camping America–Focused on privately owned campgrounds around the United States.
- The Dyrt—Another campsite reservation and discovery site, you’ll find a mixture of government land and free campsite listings here.
- KOA.com—KOA’s are common all over the country offering RV sites, cabins, and tent sites with amenities.

Choosing your campsite is a skill and one of the most fun parts of planning a camping trip. Growing up, before the multitude of online options with photos were available, my siblings and I would bike around the campgrounds making note of all our favorite sites for use in years to come. I get the same exhilaration discovering a new campsite today as I did back then. Once you have your favorite campsites, revisiting them year after year becomes its own tradition, the campsite itself is something to look forward to. Here are the key considerations I use when choosing a campsite:
- Type of campsite—Even within campgrounds like a state park there can be different types of campsites available. Often this has to do with electricity and amenities. Electric campsites will have outlets included. Primitive sites will have no electricity and often only offer pit toilets in the campground. Check the campground and site description to figure out if electricity is there, what types of bathrooms there are, and if showers are available.
- Shade—Are there good trees blocking the sun during the day? This is important if you’re camping in a place that gets hot during the day. I always prefer as much shade as possible. I’d rather go find sun than be unable to escape it. Most websites above will have campsite photos and descriptions, use them to figure out how good the shade is. Trees also provide great anchors for clotheslines and hammocks, a win-win.
- Privacy—Use the campground map alongside campsite photos to figure out how tucked away you’ll be. Are you next to the main road, at the beginning of the campground loop, or next to the bathrooms? I recommend looking for sites on straight roads with site separation, at the end of campground loops, away from main roads, and not directly next to a bathroom.
- Bathroom proximity—There’s a balance here. You don’t want to deal with the traffic, noise, and possible smell, but you also don’t want a 15 minute walk every time you need to go. There’s a happy medium to look for and balance it with the other factors above.
- Space—Do you want to spend most your time at the campsite? Maybe you want to prioritize a big plot to spread out and relax. This gives you more opportunity to design your campsite as you see fit and set the vibe.
- Location—If you’re going somewhere with multiple campgrounds think of what you’ll do during the day. Is a campground closer to the trail you want to hit or the nature center? It’s also worth checking if there’s a camp store in case you forget anything (you won’t if you use the free checklist further down!).
My recommended first camping trip (planned for you!)
If you’re just looking for some decisions to be made for you, I’m here to help. Here’s what I’d do for a first camping trip including type of trip, place, and booking a campsite. I can’t account for every location, so I’m going to book this trip pretending I’m back in my home state of Indiana. Here’s what I would do:
- One night trip during a summer weekend.
- Tent camping. Try sleeping outside!
- Go to a state park close to you that looks interesting. Use stateparks.com to find parks in your state and make a campsite booking. I like hiking and photography, so I’d choose one with plenty of trails and maybe nature-related points of interest. Maybe you like water and want to rent kayaks or a science center, choose what you’d like to do!
- Make sure the park, campground, and trails are dog friendly if you want to bring your pup.
- Check on the campground map that there are full bathrooms and showers as well as a camp store for firewood or other supplies nearby.
- Verify if you’ll go alone or bring friends, some sites have a limit on the number of people and tents allowed.
- Find an electric campsite in a campground in the state park. This gives you the most flexibility to bring things like lights, fans, air mattresses, and more for comfort. Look for a site with full or partial shade. Check photos to make sure it looks appealing, and the map for bathroom proximity and privacy.
- Check campfire regulations to make sure they’re allowed, ideally going somewhere you can have a campfire. This means your campsite needs to have a fire ring.
- Book your site! Don’t worry about gear yet, we’ll cover that in detail below.
Congratulations, you’re going camping!
The essential camping gear checklist

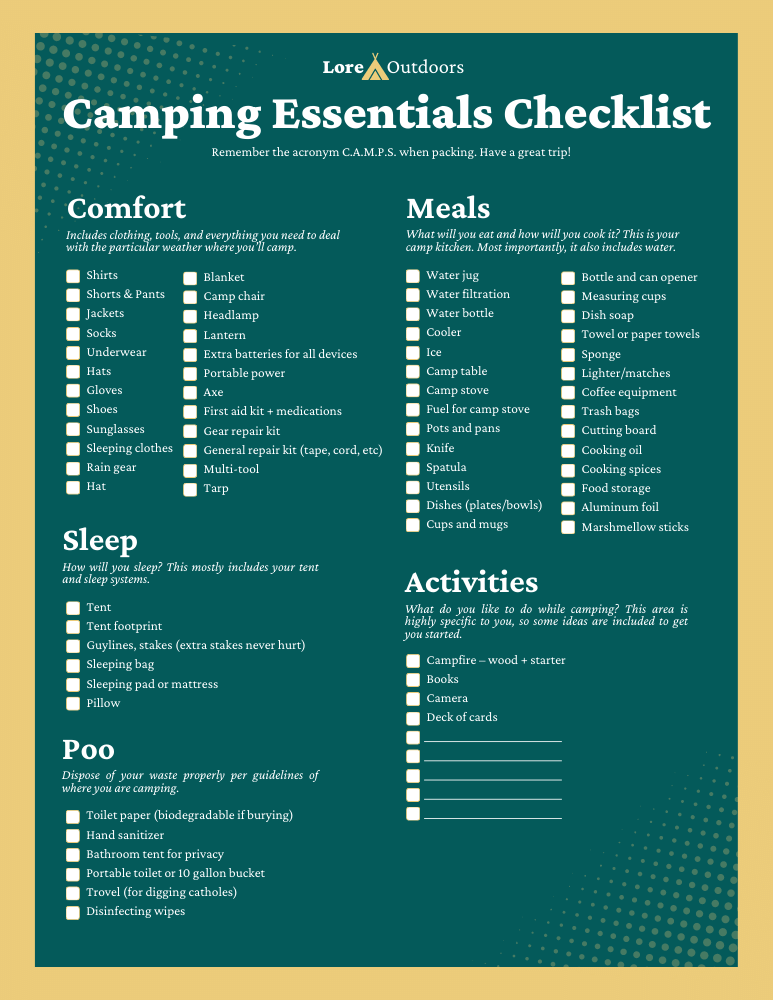
Use our printer-friendly checklist as a shopping list or packing list for your next camping trip.
Your date is set and campsite booked. Now let’s focus on what to pack. My free checklist above covers everything you need for a camping trip, organized by an easy to remember acronym: C.A.M.P.S. These five areas of gear—comfort, activities, meals, poo, and sleep—contain all the camping necessities in a way you can use every time you pack for a trip. This acronym is how I think about packing before every trip.
- Comfort—Includes clothing, tools, and everything you need to deal with the particular weather during your trip.
- Activities—What do you like to do while camping? I like hiking, reading, and photography so I always have a list of those particular items to bring. Maybe you like music or fly fishing or card games. This area is highly specific to you.
- Meals—What will you eat and how will you cook it? This includes both camp kitchen supplies and cooking ingredients. Most importantly, it also includes water.
- Poo—Everybody hurts poos. Depending on where you’re camping your needs for going to the bathroom and general hygiene will vary. But don’t worry, this doesn’t need to be stressful and we’ll walk through what you need no matter the situation.
- Sleep—This includes your tent and sleep systems, the core of your campsite.
I want to quickly share my philosophy on buying camping gear. As you’re just getting started, it’s important to ask yourself how much you want to commit to this. Camping can be an affordable activity or you can quickly spend thousands on gear. If you know for a fact this is your thing, and you’ll pursue it for years, then invest in high quality gear. Your equipment will keep you happy in adverse conditions and make your life easier, so spending on quality is worth it. If you aren’t sure, then I recommend you do a few things before dropping a lot of money.
- Use what you have at home. Chances are unless you live in Phoenix you probably have clothing to handle some cold and rain. Use all that. Cooking supplies? I still use my cast iron at home and on camping trips. Gather items at home based on the checklist above and see whats left.
- Borrow gear from your friends. If you know someone into the outdoors ask if they’d be willing to let you borrow some things. Throw them a little cash, babysit their kid, buy them a six pack if you want, but typically outdoorsy folks are stoked about friends getting into it.
- Rent gear. Many stores like REI offer rentals you can use. Check your local area for any type of outdoor shop and see what they have.
- Buy smart. As much as I’m not the biggest fan of it, many big brand stores have improved their camping options over the past few years impressively. REI has plenty of options, as well as old school brands like Coleman and even Walmart’s Ozark Trail brand is an example of this. There’s no need to spend $500 on a tent if you’re unsure this will stick, buy affordably first and you can always upgrade when you’re sure.
If you’re going to invest in quality gear, then I recommend you start with the essentials first. This includes your tent, sleeping bag, sleeping pad/air mattress, camp chair, camp stove, puffy jacket, and rain jacket. To me these items will bring you the most comfort and handle the majority of situations. Other items improve dramatically if you invest, like coolers, but it’s easier to get by with cheap options first.
One thing I recommend you get right away is a camping box. You can get a cheap one or a durable one built for camping, but this will be one of the best ways to keep all your camping essentials in one place, making packing easier. I like the Rubbermaid Actionpacker but any home improvement store should have a bin you can use. Get at least 18 gallon capacity to have room for bigger items.
What to wear camping
Using the checklist above will make sure you have what you need to be comfortable outside for a night. Your biggest consideration should be the weather. Don’t get caught without rain gear or without warm clothes on a cold night. In my opinion it’s always better to overpack. Here’s a quick list of the clothing I recommend:
- Shirts (tshirts, athletic shirts, sweatshirts)
- Shorts & Pants
- Jackets – Puffy and rain jacket two most important
- Socks
- Underwear
- Hat (winter hat for warmth, baseball cap or sun hat for cool)
- Gloves
- Shoes (outdoor/hiking, comfy camp shoes, chacos)
- Sunglasses
- Sleeping clothes—Cold sleeper? Dress warm and buy a warmer sleeping bag.
- Rain gear
Setting up your campsite
When you arrive there are a few things you can do to setup quickly and correctly. First, find a nice flat spot for your tent. Place it away from the fire ring and where you’ll cook and eat, it’s best practice to keep these areas separated for animal safety. When setting up your tent place the footprint or tarp down first (and weigh it down if it’s windy). Then stake those down and put your tent up after that, using the stakes to secure it as you go. Most tents are very light and will fly away on you if a breeze comes through. I always recommend putting your rain fly on your tent in case it rains. You can always take it off later if you want to truly sleep under the stars.
Once your tent is ready you can set up camp chairs, lights, your cooking space, and get comfortable.
What to eat when camping (+ meal ideas)

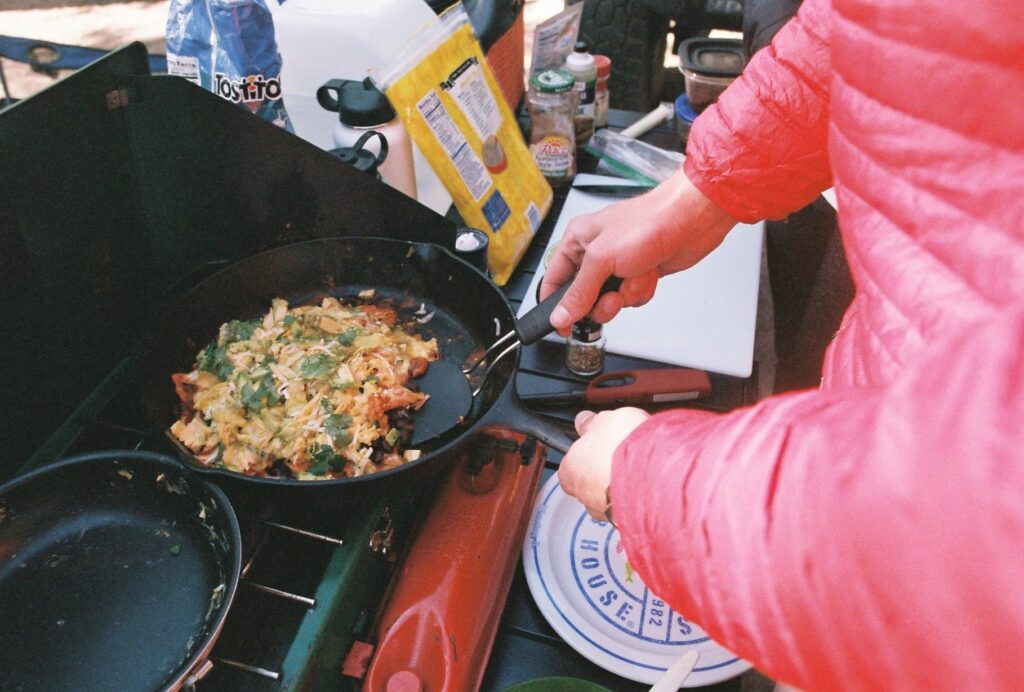
This is largely personal preference. If you’re trying to keep things as simple as possible you can eat all fresh, refrigerated, and pre-made meals and keep them all in the cooler. You don’t have to actually cook if you don’t want to. I personally love a good camp meal and my morning coffee, so I bring out the camp stove, my trusty cast iron, and enjoy some good grub. The checklist above has all the cooking equipment you need. One important point to consider is water. Check for potable water where you’re camping, if it isn’t available you’ll need to bring your own. You can buy single use jugs from most grocery stores, or get a reusable water jug. Make sure to bring extra water for dousing campfires too.
Here are some meal ideas I like to get you started, including options for cooking or not. You can take cooking as far as you want to go camping, it’s all up to you.
- Breakfast
- No cooking: Parfaits (yogurt, granola, fresh fruit, honey), oatmeal
- Cooking: Scrambled eggs, bacon, potatoes.
- Lunch
- No cooking: Deli meat sandwiches with fresh toppings, chips, carrots and dip
- Cooking: Hot dogs (ideally over the fire), potato salad, chips & salsa
- Dinner
- No cooking: Charcuterie board of cheese, cold meats, pickles, crackers, and jam. Pre-made pasta salad.
- Cooking: Tacos! I like marinated beef on the cast iron, with veggies I pre-cut before the trip, beans, fresh guacamole, and hot sauce of course.
Camping safety and dealing with fear
It’s perfectly normal to be nervous when you start camping. Let me say that again. It’s normal to be afraid. I’ve been camping for more than two decades and I still get anxious sometimes camping in the wilderness with wild animals around. So don’t feel bad if you’re feeling this way.
Let me also say that bad things happening are extremely rare, and it’s worth it to face your fear and explore the outdoors. Doing this is a part of the experience and the wonder of it all. Sometimes some discomfort is good for us. Why do you think we sleep outside for fun!?
All that said, there are some simple things to know and do to stay safe when camping.
- Separate your food, bathroom, and sleeping areas. In established campgrounds with bathrooms just your food and sleeping area. Keeping scents away from where you sleep prevents the risk of waking up to a hungry critter sniffing around you.
- Put all scented items in your car at night. Or for that matter whenever you leave your campsite.
- Arrive during daylight—Get a lay of the land and get your campsite setup comfortably before night arrives.
- If you’re in an area with bears, moose, or other similar wildlife read up on safety procedures and practices. For example, campgrounds in California often have large metal bear boxes for all your scented items due to how common bears are. Bear spray is a common just-in-case item for campers in these areas. Prevention is the best method, but know what to do if you have an encounter. I’ve had encounters with bears and moose and been just fine.
- If you feel uncomfortable, leave. This is all about feeling and instinct. If you feel something off, if someone around the campground is acting weird, don’t be afraid to pack up and leave. This can be hard to judge sometimes and is a rare occurrence, but I say this to give you permission to trust your gut.
- Check the weather! Don’t get surprised by cold, rain, any type of storm. Have a way to deal with it or a backup plan.
- Pack a first aid kit and make sure everyone knows where it is. Be prepared to treat any injuries in the off chance they occur.
Let me stress that much of this is simply being a good citizen outdoors. But being prepared helps you feel confident and comfortable outside, and that’s what I want.
Camping hacks to look like a pro
To finish off this guide, here are some tips and hacks that will make your life easier and make you look like a pro to your campsite neighbors.
- Bring cash—Just in case the camp store doesn’t accept cards!
- Bring multiple long extension cords—Whether its lights around the campsite, using a fan, or inflating your air mattress, don’t depend on power outlets being in a convenient spot.
- Setup campsite lights—Christmas lights, lanterns,
- Large picnic blanket or rug—Having a tidy space on the ground is cozy, comfortable, and a pro move. RV campers are the best at this.
- Don’t bring firewood from home—Often this isn’t allowed, check regulations, but moving firewood risks moving pests and diseases to new areas. It’s an issue to take seriously. The emerald ash borer ravaged forests in Indiana growing up and often spread through firewood.
- Prep and cut veggies before you leave—It’ll save you time during the trip.
- Your tarp can be a footprint or a shelter from rain. Always have one on you.
- Campground etiquette—You’d think this is simple, but don’t play loud music late at night and cause a ruckus the whole campground can hear. Respect that people want to enjoy the sounds of nature not your favorite song that week.
- Shower sandals—Not only for foot cleanliness in a campground bathroom, but for walking back to your campsite afterwards.
Share your first camping trip with us
You’re ready for your first camping trip. Welcome to the outdoors, it’s a rabbit hole you can explore for the rest of your life. Now go get after it.
If this guide helped you go camping, please email me at [email protected] and share your experience. This is what it’s all about for me. If you find something is missing or wrong in this guide email [email protected], I want this to be the best resource on the internet to help folks go camping, so I’ll fix any errors quickly.
Alex Eaton
I'm Alex, the founder of Lore. My life outside started with camping trips in southern Indiana as a kid, and has taken me across the world. My goal is to give you the tools and confidence you need to pursue the outdoor life you want.
Use our printer-friendly checklist as a shopping list or packing list for your next camping trip.